Azure Container Instances Rock!
I was recently updating an old website, I decided to move the old ASP .NET Web Forms code base over to latest and greatest ASP .NET Core 2.0


I was recently updating an old website, I decided to move the old ASP .NET Web Forms code base over to latest and greatest ASP .NET Core 2.0 and Razor Pages. It wasn't a large code base but it did contain some Flash and Silverlight, which given declining client support I decided to replace with equivalent HTML5 and JavaScript. The experience was so enjoyable I decided to blog about it!
Migrate Code base
My first step was to get a local copy of the source code for the site, the code was not even in source control... naughty naughty, luckily it was not a pre-compiled web application and the VB .NET... yes you read it correctly VB .NET :) source code was still available. As there was not a lot of server-side code involved I decided to port it over to C#, .NET Core supports VB .NET but I'm not sure about support for the language in ASP .NET Core see this github issue #2738 for some interesting history. Anyway I see more and more C# samples out there and it makes my life easier to have everything in 1 language. I wanted to be able to deploy this web application to any Azure PaaS which supported Containers or even some other cloud so I decided to build a Docker Image, this was literally 1 checkbox checked during File->New Project in Visual Studio 2017 [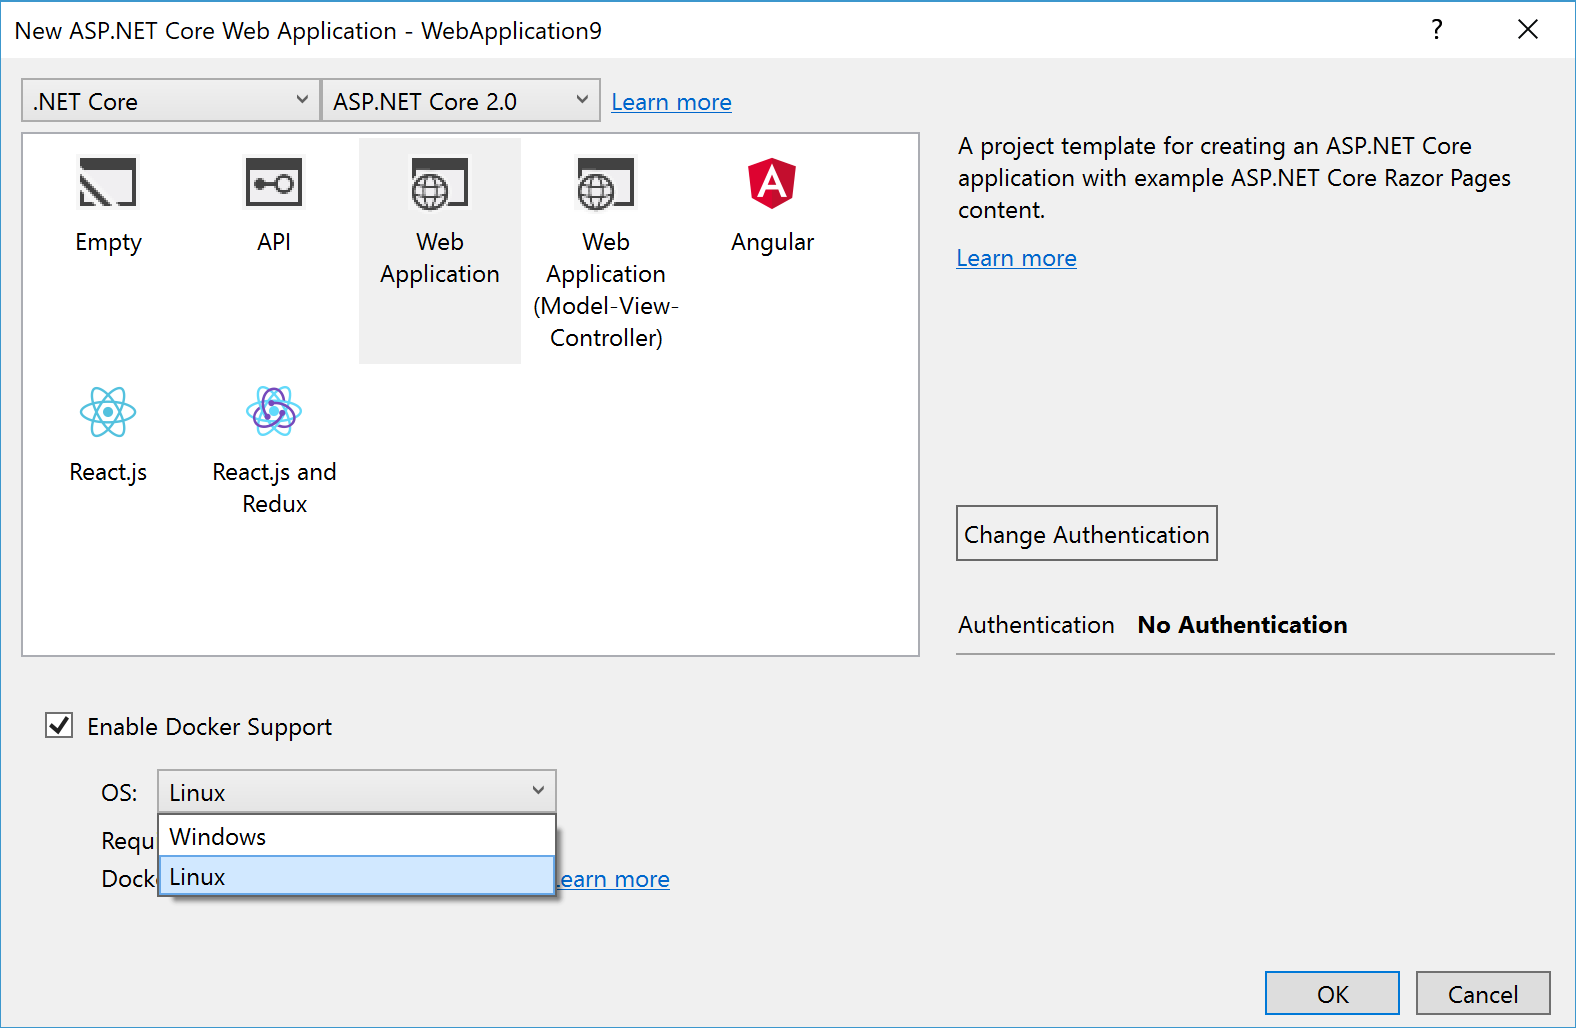 You will also find a Dockerfile in the root of your ASP.NET Core project, it defines a multistage docker build, We will use this file later when we build our solution in VSTS/TFS. The final image generated by the build command will only contain the release binaries & output for your web application.
FROM microsoft/aspnetcore:2.0 AS base
WORKDIR /app
EXPOSE 80
FROM microsoft/aspnetcore-build:2.0 AS build
WORKDIR /src
COPY *.sln ./
COPY MyWebApplication/MyWebApplication.csproj MyWebApplication/
RUN dotnet restore
COPY . .
WORKDIR /src/MyWebApplication
RUN dotnet build -c Release -o /app
FROM build AS publish
RUN dotnet publish -c Release -o /app
FROM base AS final
WORKDIR /app
COPY --from=publish /app .
ENTRYPOINT ["dotnet", "MyWebApplication.dll"]
To ensure I didn't disrupt future traffic I leveraged the ASP .NET Core URL Rewriting Middleware to redirect all traffic destined for the old .aspx pages to the new shiny Razor Pages. Ok we are now ready to move onto the next step and build our solution!
Continuous Integration with VSTS
I wanted to simplify making any future changes to my solution therefore I chose to push my code up to Visual Studio Team Services, I will also use the build automation functionality provided by VSTS to setup a CI build. With the multi-stage dockerfile our lives are made a lot easier as we bootstrap the build on the Build Agent using a docker image which contains the .NET Core SDK. This running "build" container is then used to build our solution and finally to produce the final Docker Image - we then push our Docker Image to a private Docker registry on Azure Container Registry. [ In addition to the build task setup above we also set our trigger for this Build definition to enable CI as seen below. [
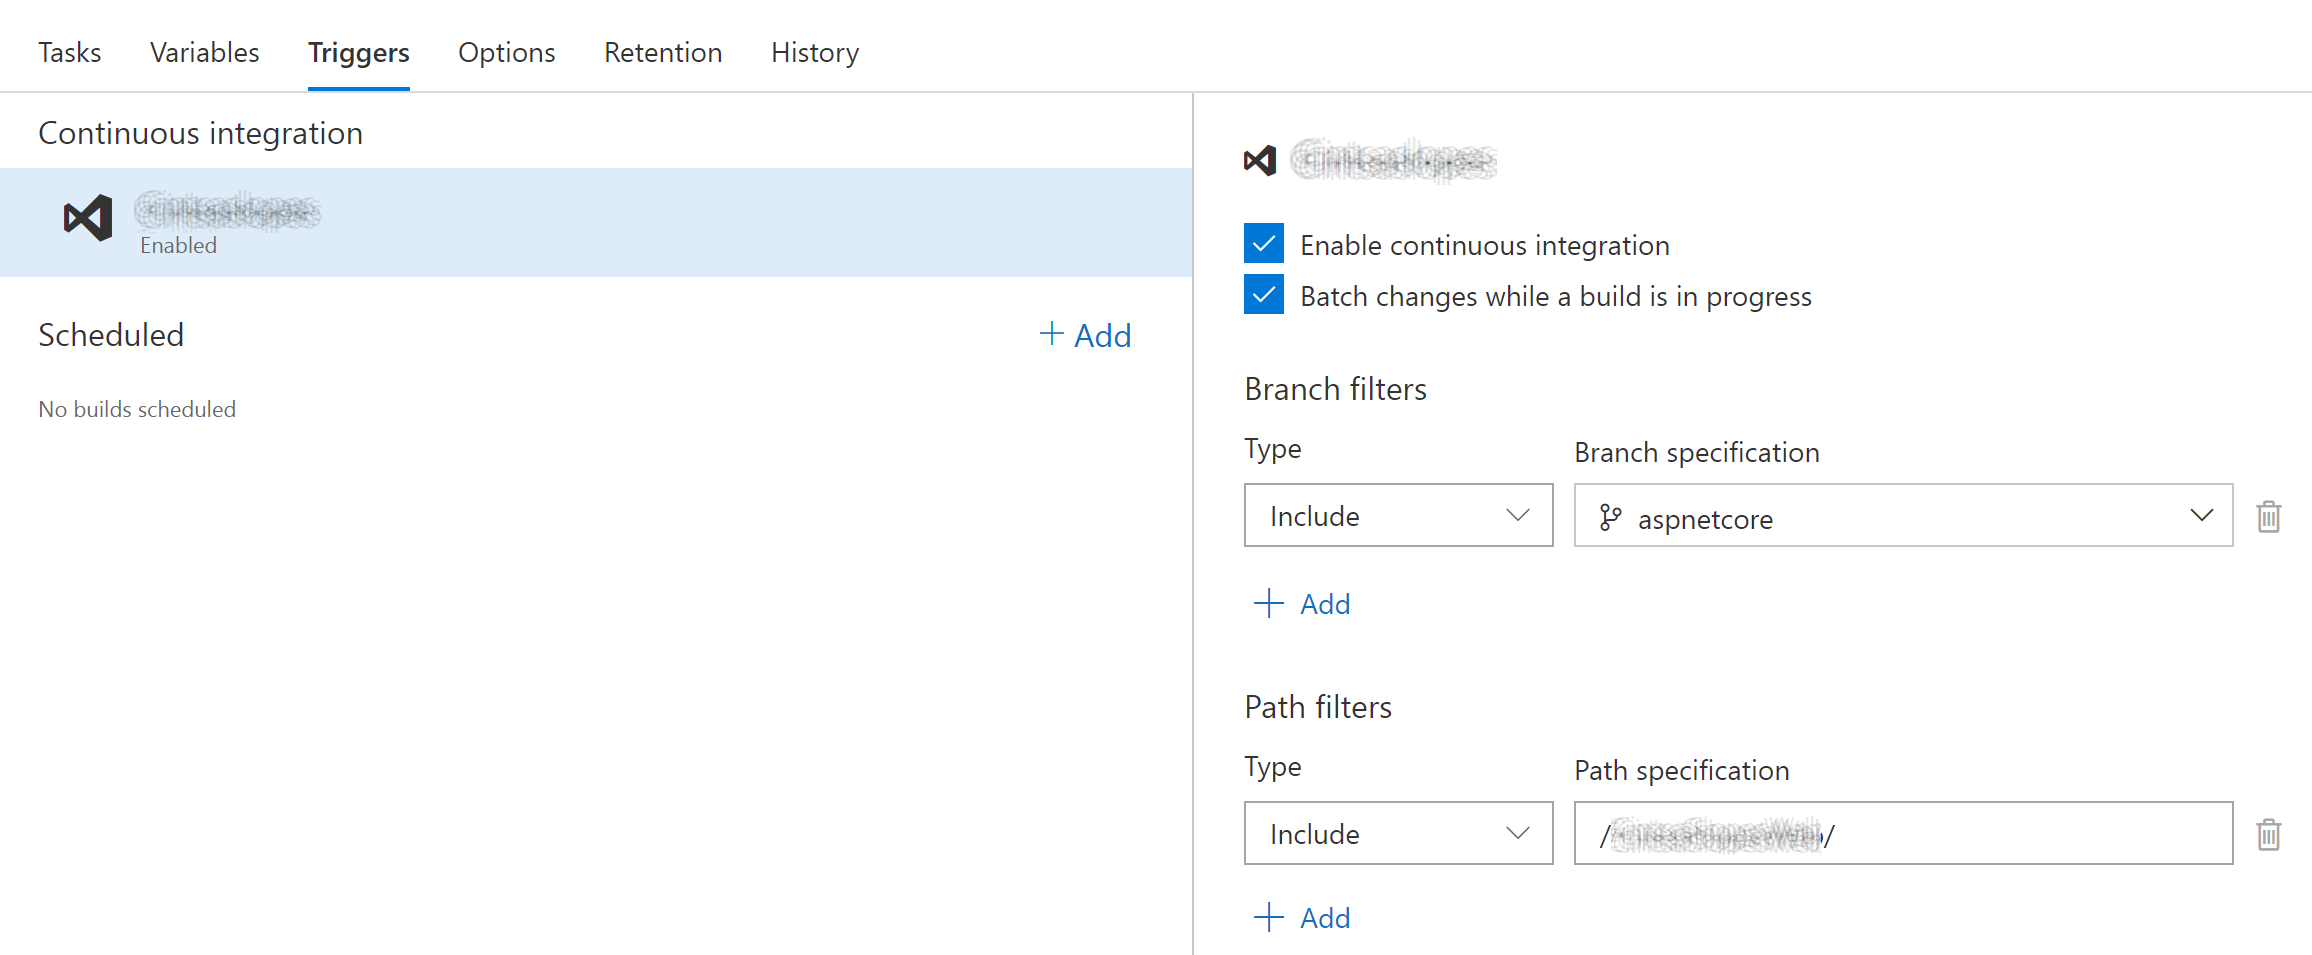 For more details how how you can build container images with VSTS/TFS check out the following resource - https://docs.microsoft.com/en-us/vsts/build-release/apps/containers/build?tabs=web
Deployment
I went back and forth thinking where I should deploy my container, App Service Containers, AKS, ACS... we are really spoilt for choice on Azure. In the end I decide on Azure Container Instance, I found this to be the simplest option! To perform the deployment I needed an Azure Subscription and the Azure Cross Platform CLI installed, this is available through the Azure Cloud Shell or to install on your local machine - https://docs.microsoft.com/en-us/cli/azure/install-azure-cli?view=azure-cli-latest Once I had the tooling installed locally I needed to login to my subscription, in my case I am using Windows Subsystem for Linux & Ubuntu.
$ az login
The login command will output further steps to the console which must be performed in your browser, once authenticated we can move on to deploying your container. [ om/content/images/2018/03/login.jpg) Create a resource group which will contain your Container Group
$ az group create --name MyWebApplicationRG--location westeurope
Finally we can deploy our container instance, specifying the docker image to deploy as well as the required resources for the instance.
$ az container create --resource-group MyWebApplicationRG --name gewebapp \
--image
--registry-password
This command will return a JSON result which will contain interesting information about your Container Group, you will see things like the public IP Address & FQDN which point to your running container, the container will be listening for traffic on TCP port 80. All I had to do was point my DNS to this new IP and I was done. For more information how deploying a simple Azure Container Instance check out the following resource - https://docs.microsoft.com/en-us/azure/container-instances/container-instances-tutorial-deploy-app
Conclusion
At this point we still have a manual deployment step but its fairly straight forward to automate it using Release Management, but as you can see we went from legacy app to a modern one in literally 60 minutes, for sure this was a simple scenario but there are a lot of single function enterprise apps out there which could benefit a bit of modernization!
Tip
Check out Virtual Kubelet Project this is a cool piece of code contributed to the community by Microsoft which allows us to add capacity to a Kubernetes cluster without adding additional nodes to the cluster, this could be a stop gap while you are provisioning new resources. The real cool thing is that you can extend your cluster with Azure Container Instances!